
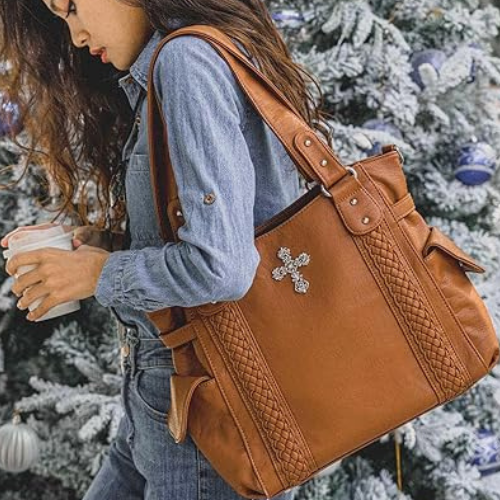
How to Restore Vintage Bags at Home
Vintage handbags are pieces of history, fashion statements, and treasured keepsakes. Whether you’ve inherited a classic leather purse, found a designer gem at a thrift store, or simply want to revive an old favorite, learning how to restore vintage bags at home can save you money and keep your beloved bags looking their best.
In this step-by-step guide, we’ll walk you through DIY bag restoration techniques, from cleaning old bags and removing stains to fixing cracked leather and polishing tarnished hardware. Whether your handbag is made of leather, suede, canvas, or fabric, you'll discover expert-approved tips to bring it back to life.

Step 1: Assessing the Condition of Your Vintage Bag
Before diving into cleaning and restoring your vintage bag, it’s important to assess its condition. Identifying the level of wear and the specific issues your bag has will help determine the best restoration approach. Some bags may only require basic cleaning, while others may need leather repair, stain removal, or hardware replacement.
a. Check for Common Issues
Examine your bag carefully under good lighting and take note of the following:
1. Surface Dirt and Grime
- Over time, dust, oils, and general dirt accumulate on the bag’s surface, making it look dull or discolored.
- Dirt buildup is common on high-contact areas such as handles, corners, and the bottom of the bag.
2. Scratches and Scuffs
- Leather bags, in particular, are prone to scratches and scuff marks from daily use.
- Some scratches are superficial and can be buffed out, while deeper ones may require leather restoration products.
3. Cracks or Peeling Leather
- If the leather is dry, cracked, or peeling, it may need conditioning or leather filler to restore flexibility.
- For bags with peeling faux leather, restoration may involve repainting or using a leather repair kit.
4. Stains and Discoloration
- Stains from ink, water, oils, or food can be difficult to remove if they’ve set over time.
- Fabric and canvas bags may show yellowing or fading, requiring deep cleaning or color restoration.
5. Hardware Tarnishing or Missing Parts
- Metal clasps, zippers, and decorative accents can become tarnished or corroded over time.
- Check for loose, broken, or missing hardware, as these may need replacement or polishing.
b. Determine the Restoration Needs
Once you’ve identified the bag’s condition, decide on the level of restoration required:
- Basic Cleaning: If the bag only has minor dirt and surface stains, a gentle wipe-down with appropriate cleaning products may be enough.
- Moderate Restoration: If there are scratches, mild discoloration, or slight tarnishing, you’ll need to use specialized leather conditioners, stain removers, or hardware polish.
- Extensive Repairs: If the bag has deep cracks, peeling leather, severe staining, or missing hardware, it will require a more detailed restoration approach, possibly using leather repair kits, dyeing treatments, or part replacements.
c. Consider the Bag’s Material
Different materials require different restoration methods:
- Leather Bags: Need conditioning, scratch repair, and proper storage to maintain suppleness.
- Suede Bags: Require special suede brushes and stain removers to maintain their soft texture.
- Canvas and Fabric Bags: Can often be cleaned with mild detergent, but deep stains may need spot treatment.
- Patent Leather Bags: Are easier to clean but can develop scuffs that need buffing.
Tip: If your vintage bag is a luxury designer handbag, be extra careful with DIY restoration, as improper cleaning methods can damage its value. For high-end bags, professional cleaning may be a better option.
Step 2: Cleaning and Removing Stains from Vintage Bags
Once you’ve assessed your vintage bag’s condition, the next step is cleaning it properly. Dirt, stains, and discoloration can make an old bag look worn out, but the right cleaning techniques can help restore its beauty. The key is to use gentle, material-specific methods to avoid damaging delicate fabrics or leathers.
A. How to Clean Leather Bags
Leather is one of the most durable materials for handbags, but it requires gentle care to prevent damage. Follow these steps to safely clean your vintage leather bag:
Step-by-Step Leather Bag Cleaning:
- Remove dust and surface dirt: Use a dry microfiber cloth to wipe off any loose dirt before applying a cleaner.
- Use a mild leather cleaner or DIY solution: Mix a few drops of mild soap (like Castile soap or baby shampoo) with warm water. Avoid harsh chemicals like alcohol or acetone, which can dry out the leather.
- Dampen a soft cloth and wipe gently: Dip a lint-free cloth into the cleaning solution and wring it out so it’s slightly damp. Gently wipe down the leather in circular motions.
- Avoid excessive water: Too much moisture can cause leather to dry out and crack. If your bag gets too wet, pat it dry immediately with a clean towel.
- Dry naturally: Let the bag air dry away from direct sunlight or heat, which can cause fading and stiffness.
- Condition the leather: Once dry, apply a leather conditioner to restore softness and prevent future cracks.
Tip: For ink stains on leather, try rubbing alcohol or a magic eraser—but test it on a hidden area first to avoid discoloration.
B. How to Remove Stains from Fabric and Canvas Bags
Fabric and canvas bags are prone to stains and discoloration, but they can often be cleaned at home with natural or mild cleaning solutions.
How to Remove Stains from Fabric Bags:
- Pre-treat stains: If your bag has tough stains (like ink, food, or oil), apply a paste of baking soda and water directly to the stain and let it sit for 15 minutes.
- Use a vinegar solution: Mix equal parts white vinegar and water and apply it to the stained area with a soft brush or sponge.
- Gently scrub the surface: Use a toothbrush or soft bristle brush to work the cleaner into the fabric without damaging it.
- Rinse with a damp cloth: Wipe off the excess cleaner with a damp microfiber cloth and let the bag air dry.
- For deeper cleaning: If the entire bag is dirty, hand wash it using mild detergent or place it in a laundry bag on a gentle washing cycle (only if the care label allows it).
Tip: To remove yellowing from white canvas bags, soak the bag in a mixture of warm water, baking soda, and a few drops of dish soap before scrubbing lightly.
C. How to Clean Suede Bags
Suede is delicate and easily absorbs stains, so it requires special care. Unlike leather, suede should never be cleaned with water, as it can cause permanent staining.
Step-by-Step Suede Cleaning:
- Use a suede brush to remove dirt: A suede cleaning brush or soft toothbrush can help lift dirt and restore the nap (the soft, velvety texture). Brush gently in one direction to avoid damaging the material.
- Remove stains with a suede eraser: For light stains, a suede eraser or clean pencil eraser can help lift marks without damaging the fabric. Rub gently until the stain fades.
- Treat stubborn stains with vinegar: Dampen a microfiber cloth with white vinegar, then dab the stained area lightly. Let it dry and re-brush to restore texture.
- For grease stains: Sprinkle a small amount of cornstarch on the stain and let it sit overnight. The powder will absorb the oil, making it easier to brush away in the morning.

Step 3: Restoring Leather and Repairing Damage
After cleaning your vintage bag, the next step is restoring its leather and repairing any damage it may have sustained over the years. Leather is a durable material, but it’s prone to scratches, cracks, fading, and peeling, especially when not properly maintained. Luckily, with the right techniques and products, you can bring your old leather bag back to life.
A. Fixing Scratches and Scuffs on Leather Bags
Scratches and scuffs are among the most common issues with vintage leather bags. While minor scuffs can often be buffed out, deeper scratches may require more intensive repair.
1. How to Repair Minor Scuffs and Surface Scratches:
- Apply leather conditioner: Use a high-quality leather conditioner or cream to hydrate the leather and minimize the appearance of light scratches.
- Buff gently with a microfiber cloth: Rub the area in small circular motions until the scratch blends in.
- Polish with a leather balm (optional): If the scuff is still visible, use a color-matching leather balm to even out the surface.
2. How to Repair Deeper Scratches:
- Clean the area first: Wipe the scratched leather with a damp cloth and let it dry.
- Apply leather repair balm: Choose a leather repair balm that matches your bag’s color and rub it into the scratch using a soft cloth or sponge.
- Buff and blend: After applying, buff gently to blend the repair into the surrounding leather.
- Seal with a leather protector: Once dry, apply a leather sealant or conditioner to protect against future scratches.
3. How to Repair Cracked or Peeling Leather
Over time, leather can dry out, crack, or peel, especially if it has been exposed to heat, humidity, or improper storage. While severe damage may require professional repair, small cracks and peeling areas can be fixed at home.
Step-by-Step Guide to Repairing Cracked Leather:
- Clean the cracked area: Wipe the surface with a damp cloth to remove dust and oils.
- Apply mink oil or leather conditioner: For minor cracks, rub mink oil or leather conditioner into the area to restore moisture and flexibility.
- Use leather filler for deeper cracks:
- If the cracks are more pronounced, apply a thin layer of leather filler using a spatula or cotton swab.
- Let it dry completely before applying another layer if needed.
- Buff and condition: Once dry, buff the area with a soft cloth and apply leather conditioner to keep the leather soft and supple.
4. How to Fix Peeling Leather (Faux or Genuine):
- Trim any loose flakes: Use small scissors or a razor to carefully remove excess peeling leather.
- Apply leather glue: For peeling areas, apply a thin layer of leather glue to reattach loose leather pieces.
- Use a leather repair kit: If the peeling is widespread, a color-matching leather repair kit can help disguise the damage.
Tip: Do not use super glue on leather, as it can harden and crack, making the damage worse.
5. Reviving Faded Leather Bags
Vintage leather bags often lose their original color over time due to sun exposure, wear, and aging. If your bag looks dull, faded, or uneven, you can restore its color with a leather dye or restorer.
How to Restore Leather Color:
1. Choose the right leather dye or restorer:
- If your bag is only slightly faded, a color-refreshing leather cream may be enough.
- For more significant fading, use a leather dye that matches the original color.
2. Clean the leather before applying the dye: Use a leather cleaner to remove any dirt or oil buildup.
3. Apply the dye in circular motions: Using a sponge or soft cloth, rub the dye into the leather in small circles for an even application.
4. Let it dry completely: Allow the dye to air dry for at least 24 hours before handling the bag.
5. Buff and seal the color: Once dry, buff the leather with a microfiber cloth and apply a leather sealant or protector to lock in the color and prevent future fading.
Tip: Always test leather dye on a small, hidden section of the bag before applying it to the entire surface to ensure a perfect color match.
Step 4: Polishing and Restoring Bag Hardware
The hardware on a vintage bag—such as zippers, clasps, buckles, and studs—can tarnish, rust, or become loose over time. Restoring these small details can instantly elevate your bag’s overall appearance and make it look polished and well-maintained. This step will cover how to remove tarnish, fix loose hardware, and replace missing pieces to bring back the original shine and functionality of your handbag.
1. How to Remove Tarnish from Metal Hardware
Vintage bags often have gold, silver, or brass hardware that may oxidize over time, leading to tarnishing and dullness. Instead of replacing these pieces, you can clean and polish them at home with a few simple techniques.
Step-by-Step Guide to Cleaning Tarnished Metal Hardware:
a. Identify the type of metal:
- Brass: Tends to develop a greenish patina over time.
- Gold-plated: More delicate and requires a gentle cleaning approach.
- Silver or chrome: Can tarnish but usually polishes back to a shiny finish.
b. Use a metal polish:
- Apply a small amount of metal polish (like Brasso or Wright’s Silver Cream) on a cotton swab.
- Rub it gently over the hardware, avoiding contact with the leather or fabric.
- Buff with a soft microfiber cloth until the shine is restored.
c. Try a DIY Cleaning Solution (for mild tarnish):
- Lemon & Baking Soda: Mix equal parts of lemon juice and baking soda to form a paste. Apply with a soft toothbrush and scrub lightly.
- White Vinegar & Salt: Dip a cloth in white vinegar, sprinkle a little salt, and rub it on the hardware.
d. Buff and protect:
- Once clean, buff with a dry microfiber cloth to bring out the shine.
- Apply a thin coat of clear nail polish or a jewelry protectant spray to prevent future tarnishing.
Tip: If the hardware is heavily rusted, use a rust remover or fine steel wool (but be very gentle to avoid scratching the metal).
2. Fixing Loose or Missing Hardware
Over time, screws, clasps, zippers, and metal accents on a vintage bag may become loose or fall off. While some repairs require professional help, many hardware fixes can be done at home with basic tools.
How to Tighten Loose Screws and Clasps:
1. Use a mini screwdriver:
- Check for loose screws on clasps, buckle attachments, and strap connectors.
- Use a precision screwdriver (found in eyeglass or electronics repair kits) to gently tighten them.
2. Apply a small drop of clear nail polish or thread locker:
-
If a screw keeps coming loose, apply a tiny drop of clear nail polish or thread-locking glue before tightening it. This helps secure it in place.
Step 5: Conditioning and Protecting the Bag
Now that your vintage bag is clean, restored, and polished, it’s essential to protect it from future wear and tear. Proper conditioning, storage, and care will extend the life of your handbag, keeping it supple, free from cracks, and in top condition for years to come.
1. Moisturizing and Protecting Leather Bags
Leather is a natural material that loses moisture over time, leading to dryness, stiffness, and cracks. Conditioning your bag regularly restores moisture, enhances durability, and maintains a soft, luxurious feel.
How to Properly Condition Leather Bags:
- Choose a high-quality leather conditioner:
- Look for a pH-balanced leather cream or conditioner free from harsh chemicals.
- Avoid using oils like coconut or olive oil, as they can darken the leather unevenly.
-
Apply a small amount with a soft cloth:
- Use a microfiber cloth or sponge to apply a thin layer of conditioner in circular motions.
- Pay special attention to handles, corners, and high-contact areas.
- Apply a leather protectant (optional):
- If you live in a humid or rainy climate, use a waterproof leather spray to protect against moisture damage
- Repeat every 2-3 months:
- Conditioning every few months keeps the leather hydrated and prevents premature aging.
Tip: For exotic leathers like patent leather, snakeskin, or crocodile, use a specialized conditioner designed for those materials to prevent damage.
2. Proper Storage Tips for Vintage Bags
Storing your vintage bag correctly is just as important as cleaning and conditioning it. Poor storage can lead to misshapen bags, mold growth, fading, and scratches.
How to Store Vintage Bags Properly:
1. Stuff bags with tissue paper to maintain shape
- Use acid-free tissue paper or a soft fabric pouch to fill the inside of the bag.
- Avoid newspaper, as ink can transfer onto the interior lining.
2. Use dust bags to prevent scratches
- Store your bag in a soft, breathable dust bag to protect it from dust, light exposure, and scratches.
- If you don’t have a dust bag, a cotton pillowcase works as a great alternative.
3. Avoid plastic storage to allow airflow
- Never store vintage bags in plastic bags or airtight containers, as they trap moisture, leading to mold and mildew.
- Opt for a cool, dry storage space with good airflow.
4. Store upright in a cool, dark place
- Keep handbags away from direct sunlight, as prolonged exposure can fade the color and dry out the leather.
- Avoid damp environments like basements, which can encourage mold growth.
5. Keep hardware wrapped
- If your bag has metal hardware, wrap it in tissue paper or felt to prevent oxidation and tarnishing.
6. Rotate bag usage
- If you have multiple vintage bags, rotate their use to prevent prolonged stress on any one handbag.
Conclusion: Bring Your Vintage Bag Back to Life!
Restoring a vintage bag at home is a rewarding and cost-effective way to preserve its beauty, extend its lifespan, and even increase its value. By following these step-by-step techniques, you can clean, repair, and protect your handbag, ensuring it remains in top condition for years to come.
Whether you’re removing stains, fixing scratches, reviving faded leather, or polishing hardware, taking the time to care for your bag properly will keep it looking timeless and elegant.
Have you tried restoring a vintage bag before? Do you have a favorite cleaning or repair trick? Share your experiences in the comments below!